Showing posts with label Palestine. Show all posts

Friday 1 July 2016

A tough day at El Mughar

After driving the Turks out of Gaza, General Allenby continued to put pressure on the Turkish 7th Division in the hills to the north and north East. The hill villages were good defensive positions for the Turks, but Allenby was determined not to give them time to dig in and make them impregnable!

The 155th Brigade, holding the right flank of the 53rd Infantry Division, was ordered to advance with all haste. The Scots of the brigade had spent an uncomfortable night in Beshshit after the assault of the previous day. There was on;y one well and the Turks had partially destroyed it as they abandoned the position. Men and horses, alike, were thirsty. They had to push on for water.

Allenby had quickly reorganised the 155th brigade after it's successful assault of Beshshit the day before. They needed to push on to take the hill villages of El Mughar and Katrah -before the Turks had time to entrench. Anyway, both villages had better wells ... and the brigade needed water, and fast! In the last hour before dawn, the 155th moved down out of Beshshit to the edge of the Wadi Jamus - the line for where the assault would kick off.

The assault of the 155th Brigade begins in ernest. Kick off time is 05:00 with the first glint of dawn on the horizon.


... and on they marched in the first light of day!

Any element of surprise now lost, the pipers of the Royal Scottish Fusiliers rang out in the morning air despite the dry mouths all round!

A squadron of the Australian Light Horse galloped up to ensure a connection was maintained between the left flank of the 155th Brigade and the 5th Mounted Brigade to their left.

Turkish lancers sweep onto the plains hoping to neutralise the support being provided by the Australian Light Horse .

The British left found itself well in advance of the right flank due to delays caused by the broken ground of the Wadi Jamus. The order was given to press home the assault on El Mughar in the hope that the left flank would soon catch up.


British artillery registration was first rate during the initial assault. The town square of El Mughar screamed with HE and shrapnel that decimated the troops of the 20th Alay who were lining the cactus hedges.

Having scaled the slopes to El Mugha, the Royal Scots laid down heavy rifle fire against the remaining Turkish defenders.

After the initial lack of momentum for their assault, the ANZACs cornered the Turkish lancers behind El Mughar and put them to flight.

By mid morning, the British left closed on El Mughar despite scattered gun fire taking its toll. 

The ANZAC mounted infantry swept around the walls of El Mughar, putting the Turkish cavalry to flight (and a flighty bunch of 'Damned Sodomites' they were!). Withering fire from the Royal Scots cleared the village square. A Bolus of the 20th Alay had already routed - would the remnants be able to hold out in the mud huts to the rear of the village?

The morning had seen a successful assault on El Mughar, now the 155th Brigade tuned its attention to the stalled right flank. As the signallers of brigade HQ established contact, the order to advance and assault Katrah galvanised the battalion commander into action.

As the assault turns to Katrah in early afternoon, the concentration of Turkish defenders started to take a toll on the advancing British infantry.

The musketry of the Royal Scots Fusiliers had cleared El Mughar but the troops had lost the impetus to make the final assault on the village.

As the brigade's assault reaches it's high water mark, Turkish and British artillery began to take a heavy toll in the centre.

Katarrh held out all day without looking like falling.The concentration of troops would certainly have suffered had more British artillery support been available.

British casualties were heavy.

The casualty count for the Turks was likewise heavy. Notable was the loss of two Alay commanders and the routing of a Tabur from the 20th Alay.

The final capture of El Mughar and the failure of the assault on Katrah suggests the game concluded with a draw. With reinforcements, the British would surely take Katrah the next day, if the Turks didn't slip away or reinforce their position overnight.  Neither side can claim a strategic victory at this stage.


Mentioned in dispatches:

There were some units a that deserve special mention for gallantry and poltroonery. 

The Pasha Bashers of the 2nd Tabur of the 20th Alay. The 20th Alay was decimated in the defence of El Mughar but the 2nd Tabur held out in the mud huts until the village was lost. In the face of an earnest assault by the Royal Scots Fusiliers they still managed to charge out  behind a stone wall and wipe out an entire company of the attackers.

Was it poltroonery or was it incompetence? The elements of the 155th Brigade MG Company under Captain Harry Flashgun, never made it out of the marshland at the end of the Wadi Jamus beneath the British start line.

The 1/4 Kings Own Scottish Borderers deserve special mention and a smattering of VCs for their determined frontal assault on the hill village of Katrah. Having reached within 400 yards of the objective, the withering machine gun and rife fire from the 21st Alay halted their advance the battalion having suffered over 600 casualties. 


The Turkish 21st Alay inflicted serious damage on the British right and centre throughout the second half of the assault.  A special mention is deserved for the right flank of the Alay that was nearly wiped out on the south-western slopes of Katrah. They may have fallen like flies, but they took just as many with them.

Sunday 17 April 2016

Somewhere in Palestine, 1916 ... If the Lord Spares Us

A bloke needs a shed. I have one, but it has been perpetually full of junk for years now (good junk, but full nonetheless). But, after a number of merciless 'chucking sessions' in recent weeks, I have finally come to the point where the shed becomes a plausible gaming venue – even if it is somewhat lacking in creature comforts (e.g. leaking roof (not over the tables), hot in summer and cold in winter).
A New Hope! Wargaming in the shed!
I've been keen to get some serious gameplay under my belt using the Too Fat Lardies classic, If the Lord Spares Us (WW1 in the Middle east). Previously, trying to war-game in a busy household had led to rushed set-ups, late at night when all was quiet, only to have to pack up after a few turns to clear the decks for morning. No longer shall the domestic needs of the many curtail the wargaming needs of the few (well, me).

So, my first decent attempt at ITLSU with my Eureka Miniatures 15mm troops, was a 'somewhere in Palestine' encounter where a brigade of British infantry supported by a troop of armoured cars, assault and Ottoman stronghold surrounding an Oasis town of El-Gouna. The British have occupied a small Oasis from where they will launch their attack.  but not enough to maintain their current position. Their only hope is to capture the wells held by Johnny Turk, a few miles to the 

The task of capturing El-Gouna and its wells, intact, fell to Brigadier-General A.W. Tufnel (classified as an Eaton commander) and the 126th East Lancashire Brigade:
  • 1st Battalion, 4 companies of 4 bases, infantry + 1 x MG (Jolly Good Fellows, spunk rating 0)
  • 2nd Battalion, 4 companies of 4 bases, infantry + 1 x MG (Saturday Boys, spunk rating 1)
  • 3rd Battalion, 4 companies of 4 bases, infantry + 1 x MG  (Saturday Boys, spunk rating 1)
  • 2 Armoured cars (1 base, Jolly Good Fellows, spunk rating 0)
Initial deployment with the Ottoman forces deployed in two redoubts overlooking the oasis. I randomly allocate troops to each blind once they are spotted or choose to come out of cover. The Empire troops have limited water at this oasis (bottom of picture) but must push on to secure the more reliable water supply at El-Gouna.
The Empire troops advance cautiously across the open ground before El Gouna. On the British left cover is taken behind a rocky hill.

The Empire forces are spotted from the air by a lone Taube (due to the Biggles card turning up this turn). 
I've never found time to finish this post so will upload the pictures I have to hand. Ultimately, the British force managed to push the Turks off the hill on their left (by sweeping around the wire). However, the Turks managed to hold the hill on the British right flank.


The 3rd battalion of the East Lancs in the British centre manages to push along the wadi with support from a pair of armoured cars on their left. This was the beginning of the end for the Turkish defence.


Saturday 26 March 2016

Adobe buildings and some naval gaming from the Tin Shed

At last the Easter long weekend has come and a chap can spend more time in his tin shed!

Having the opportunity now to use larger war gaming tables brings with it the need to increase my terrain holdings. The first project was to construct some more Adobe dwellings (in 15mm) to bulk out my villages for ITLSU.
A few simple cork buildings and the corner towers for a Ottoman fort for use in Gallipoli (in particular Sedd el Bahr castle for V-Beach landings) and Middle East scenarios.
I've been using Woodland Scenics plaster cloth over the cork to give a better textured finish. Here you see the plaster laid over the roofs with the walls to follow.
With the new set-up in the shed, I've been keen to do a little naval gaming and in a moment of creativity decided to create a backdrop on canvas which I can use to improve the feel of the table. I was rather pleased with what was achieved with three acrylic colours and absolutely no pre-planning - I just mixed a few blues and greys on the fly and slapped it on. Now the base cloth looks rubbish - so that is next!
A set-up atmospheric shot of some Panzerschiffe 1:2400 ships taking advantage of the new backdrop.
Battle off Ulsan
A favourite encounter of mine (because it's the only Russo-Japanese War naval scenario I have the ships for!) is the engagement off Ulsan, Korea, in The Sea Of Japan, on 14 August 1904, 0500 Hrs.

I have played this scenario with a number of rule sets (see earlier posts), but this time I return to Coaling Stations, a set of quick play pre-dreadnaught rules by Twylite Games I keep coming back to. I really like the card mechanism for giving orders - it tends to add a little 'fog of war' to solo naval gaming.

Here's a shot of the opening salvo!
Through the light mist that persisted to midday (in this scenario) Admiral Kamimura (right) spots Admiral Iessen's Vladivostok Squadron at a distance of 3.2 nautical miles and opens fire with his 8-inch guns scoring a hit
on the Gromoboi.
I've been working on improving the way I store gaming aids on the table. I've recently transferred all my markers into old tobacco tins as I feel they give a nice feel to the table. In this case, the Capstan Old Navy Cut tobacco tin seems quite appropriate (even if it hales from 30 years after the RJ War)!

Wednesday 30 December 2015

Scratch built terrain for WW1 Middle East in 15mm

There is so much to love about the festive season – family (tricky relations ... maybe less so!), holidays, excellent nosh, left-overs ... and time to get stuck into wargaming projects.

The main focus of this Christmas break has been consolidating my collection of (mainly scratch built) 15mm terrain for my WW1 Sinai, Palestine and Mesopotamia gaming with TFL's If the Lord Spares Us ruleset. Rules errata and list of scenarios here.

Here is a selection of the pieces I have created so far:

1. Entrenchments and wire
I have created stands of a simple wire entanglement (see below) using copper wire coiled around a rod, glued to a base and with tooth pick uprights. A dozen of these probably took no more than an hour from start to finish - I'm happy with the overall result from that fairly minimal effort.
Barbed wire entanglements were constructed using cold copper wire (some 1.5mm electrical wire stripped of its plastic insulation).
I am planning on using a felt base mat with a combination of hex-terrain underneath the mat to create different elevations and simple multi-layer hills made of cork. Trenches will be represented using Battlefield Accessories' Hasty Entrenchments as seen in this previous post. While it would be great to have trenches dug into terrain boards, I prefer the flexibility of this arrangement.
Battlefield Accessories 'Hasty Entrenchments' - 12 per pack with each piece individual.
My reading so far suggests that strongpoints and redoubts used by the Ottoman forces in the campaign were largely limited fairly thinly wired trench systems. Bunkers were rarely used with cement being a rare resource in the desert. It's hard to discuss such defensive positions without briefly recalling Tank Redoubt - the shell of a destroyed Mark 1 tank used by the Ottoman troops as a strong point at the Second Battle of Gaza (19 April 1917) – maybe an Irregular Miniatures Mk 1 could be used for this!

Incidentally, I found an interesting (to me, at least) newspaper article about the Imperial Camel Corps (with mention of Tank Redoubt) at Second Gaza here: http://trove.nla.gov.au/ndp/del/article/92736094


2. Buildings


I have created a series of adobe buildings for villages and oasis buildings. I have used Matakishi's building technique using 6mm floor tile cork for the base structure.

This time I've experimented with improving the texturing of the outside by using a layer of Woodland Scenics plaster cloth over the cork. I find the resulting finish worth the extra effort.
I've then painted the dry plaster cloth with Vallejo Iraqui Sand, followed by a wash of dark brown and a dry brush of off white to pick up the highlights. The result, in my opinion is a very passable building that is cheap, easy to make.

3. Wadi
The dictionary definition for wadi is:

  • the bed or valley of a stream in regions of southwestern Asia and northern Africa that is usually dry except during the rainy season and that often forms an oasis :  gully, wash
  • a shallow usually sharply defined depression in a desert region


While some wadi that were encountered during the desert campaigns of 1915-18 were obviously of the larger type – deep ravines and valleys cut by a seasonal riverbed, these are tricky to easily represent on the tabletop.
Margin of Wady Ghuzze at Shellal, Palestine, Australian War Memorial
Source: https://www.awm.gov.au/collection/J00461/
To represent the smaller wadi that were common during this campaign, I have adopted a fairly simple dry river bed made up of textured canvas (from an old terrain mat I cut up) with gravel lining the edges. I scattered a little flock over this and gave it a solid spray with matt varnish.
Simple wadi terrain
4. Oasis
The oasis and desert wells were locations of strategic importance during this campaign – obviously, due to the limited water supplies carried by the troops. Ion Idriess, in his memoir of his time in Gallipoli, Sinai and Palestine with the 5th Australian Light Horse (The Desert Column), provides many accounts of riding considerable distances to engage the Ottoman forces with only a canteen of water to last a day or more – often shared with their horses! The accounts of infantry mad with thirst is horrible to contemplate.
The groundwork for the oasis was built up using acrylic brown mastic over a textured polystyrene sheet with gravel, flocking and some small stones around the edge. I added some dry grass tufts for a bit of character. The water is just painted at present.

This project has finally provided a use for a pack of 100 plastic palm trees purchased from a supplier on Ebay (for only a few dollars). They could do with a paint job, but don't look too bad.

5. Hills
I've opted for a simple hills made up of layers of flocked and painted 6mm cork tile in the style of those pioneered by Major General Tremorden Rederring's Colonial-era Wargames website - sadly no longer being maintained. I formed the shapes by breaking the cork sheet by hand, giving a rough edge that paints up well as exposed rock and overcomes the issue of getting miniatures to stand up on slopes.

I will also use the wooden hex terrain which I have used for Great War Spearhead II – see this previous post.

6. Terrain mat
This is still a work in progress. I'm planning on using a felt mat from a local (Melbourne, Australia) supplier of felt: http://www.jjdavies.com.au/decorative-felts

JJ Davies can provide felt in widths of up to 180cm and will cut to order. I'll provide a review once I have purchased it. I will probably use colour # 311 or 318 and may use a few patches of spray paint on it to give some variation. More to follow on this.

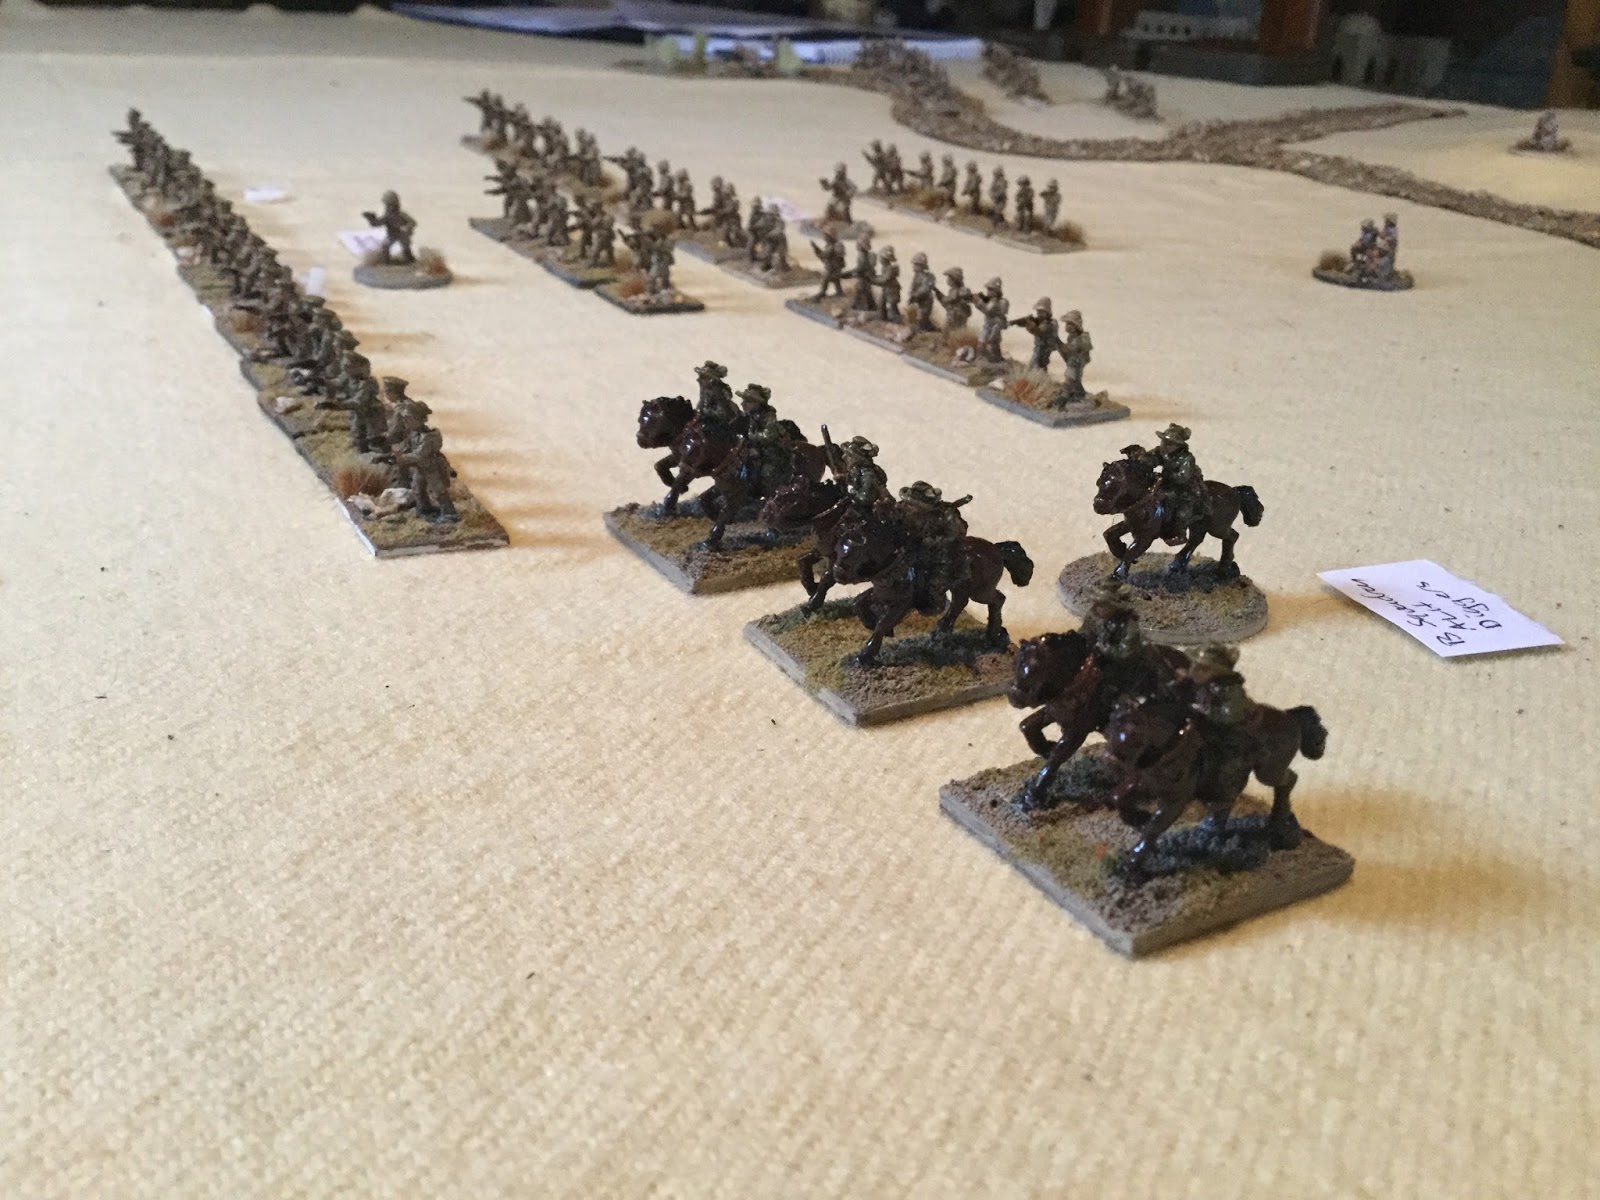
That's about it for now. The next step is to get to work on the mounted troops (Australian Light Horse, Imperial Camel Corps and Ottoman cavalry), artillery and some irregular Arab infantry. And, maybe some gaming! Ha ha.

Thanks for dropping by – I hope the festive season has been good to you and thanks for your support in 2015.